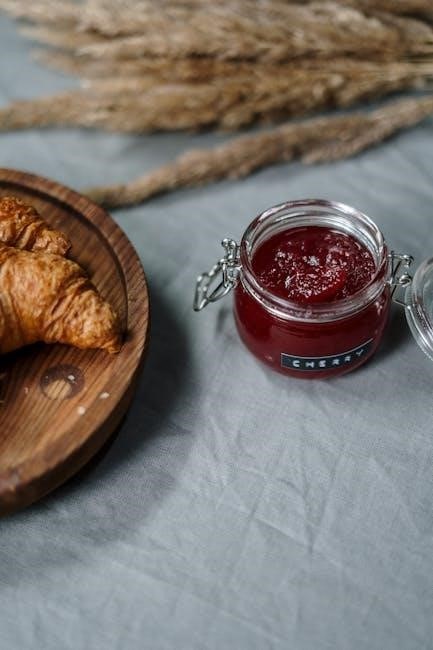
Learn to make delicious jelly with Sure-Jell instructions and recipes online, including tips and tricks for perfect jelly making, using fresh fruit and sugar for the best results always.
Overview of the Jelly Making Process
The jelly making process involves several steps, starting with preparing the fruit, then mixing it with sugar and pectin, and finally cooking the mixture to create the perfect jelly.
The process requires attention to detail and careful measurement of ingredients to ensure the jelly sets properly.
Using Sure-Jell instructions and recipes can help guide you through the process, providing tips and tricks for making delicious jelly at home.
With the right ingredients and equipment, you can create a variety of jelly flavors using fresh fruit and sugar.
The jelly making process can be rewarding and fun, allowing you to experiment with different flavors and ingredients to create unique and delicious jelly recipes.
By following the Sure-Jell instructions and using the right techniques, you can make perfect jelly every time, whether you’re a beginner or an experienced jelly maker.
The process of making jelly can be a fun and creative activity, allowing you to express your creativity and share your delicious creations with friends and family.
Overall, the jelly making process is a fun and rewarding experience that can be enjoyed by anyone.

Preparing the Fruit for Jelly Making
Wash and crush fresh fruit to prepare it for jelly making with Sure-Jell instructions always.
Crushing and Measuring the Fruit
To start making jelly with Sure-Jell, it is essential to crush and measure the fruit correctly. This involves washing the fruit, removing any stems or leaves, and then crushing it to release the juice. The amount of fruit needed may vary depending on the type of fruit and the desired flavor. According to the Sure-Jell instructions, it is crucial to use the correct amount of fruit to ensure the jelly sets properly. Measuring the fruit accurately is also important, as using too much or too little fruit can affect the final result. The crushed fruit should be measured and then mixed with the correct amount of sugar and Sure-Jell pectin to create the perfect jelly mixture. By following these steps and using the right amount of fruit, you can create delicious homemade jelly with Sure-Jell. The correct measurement of fruit is vital for the best results.

Mixing the Fruit with Sugar and Pectin
Mixing fruit with sugar and pectin creates a perfect jelly mixture always using Sure-Jell instructions and recipes online for best results every time with fresh fruit.
Adding Sure-Jell Original and Butter to the Mixture
To complete the jelly mixture, stir in one package of Sure-Jell original and a teaspoon of butter, which helps reduce foam formation during the cooking process, ensuring a smooth jelly texture.
The addition of Sure-Jell original is crucial as it contains pectin, a natural occurring substance in fruit that helps thicken the jelly, while the butter helps to create a clearer jelly by reducing foam.
This step is important to follow carefully, as instructed by the Sure-Jell recipe, to achieve the desired jelly consistency and texture.
By following this step, you can create a delicious homemade jelly that is perfect for topping toast, yogurt, or using as a filling for cakes and pastries, with the help of Sure-Jell original and butter.
The mixture is now ready to be cooked, which is the next step in the jelly making process, where the mixture will be boiled and tested for set, to ensure the perfect jelly consistency.
With the addition of Sure-Jell original and butter, the jelly mixture is now complete and ready to be cooked, which will help to create a delicious and flavorful homemade jelly.

Cooking the Jelly Mixture
Cook the mixture to the boiling point, then reduce heat, using a thermometer for accuracy, to ensure proper cooking and jelly formation always with Sure-Jell instructions.
Boiling the Mixture and Testing for Set
To ensure the jelly sets properly, it’s crucial to boil the mixture to the correct temperature, usually around 220 degrees Fahrenheit, using a candy thermometer for accuracy.
The boiling process should be done rapidly, with constant stirring, to prevent scorching or burning of the mixture.
Once the mixture has reached the correct temperature, remove it from the heat and let it cool slightly before testing for set.
Testing for set involves placing a small amount of the jelly mixture on a plate or spoon and letting it cool to room temperature, then checking if it has formed a firm, jelly-like consistency.
If the jelly is still too runny, return the mixture to the heat and continue boiling until it reaches the correct set.
It’s also important to note that altitude and humidity can affect the setting of the jelly, so adjustments may need to be made accordingly.
By following these steps and using Sure-Jell instructions, you can achieve a perfectly set jelly every time.
Proper testing for set is essential to ensure the jelly turns out correctly.
Pouring and Storing the Jelly
Pour the jelly into sterilized jars, leaving space, and seal tightly, then store in a cool place, using proper canning techniques always.
Skimming Off Foam and Letting the Jelly Set
To ensure the jelly sets properly, it’s essential to skim off any foam that forms on the surface after pouring it into jars. This can be done using a metal or wooden spoon, gently removing the foam to prevent it from interfering with the jelly’s texture. Once the foam has been removed, the jelly should be left to set at room temperature, away from direct sunlight and heat sources. This process can take several hours, depending on the recipe and the environment. It’s crucial to let the jelly set undisturbed, as this will help it to develop its characteristic texture and consistency. By following these steps, you can ensure that your homemade jelly turns out perfectly, with a clear and firm texture that’s perfect for spreading on toast or using as a topping for yogurt or ice cream. Proper setting is key to a great jelly.